Ice Caves are some of the most fascinating natural phenomena Iceland has to offer and they’re well worth a visit. If you want to photograph them there are a few things to know.
To have the terms correct. Whereas ice caves is the broad term and doesn’t have to be made of ice these kind of ice caves are for self-explanatory reasons actually called glacier caves. In this article I will however use the broad term.
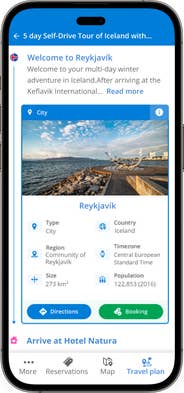
Guide to Iceland offers many tours to Ice Caves
Almost all the ice caves in Iceland are located at Vatnajökull and the surrounding glaciers. That’s a 5-6 hour drive from Reykjavik. To have enough time to have this great experience you have to calculate with at least a couple of days stay in Iceland. The ice cave season in Iceland is between November and throughout March. Going outside this time is simply too dangerous because of how much and fast the glaciers melt.
This is the main reason why you don’t go looking for ice caves yourself. Beside the risk of a giant piece of ice breaking off and killing you, you might also slip and slide. And you do not want to fall into a whole like this… or this… Always, always, always go with a glacier guide.
A lot of safety is involved in an ice cave tour and Guide to Iceland provide some fantastic guides. They will provide you with the necessary gear such as crampons and helmets. Inside the caves the guides tell stories, jokes and explain how the glaciers and glacier caves work.

Dependent on the time, the size of the glacier cave, the conditions of the caves, weather etc. you might even get to see other caves in the near area. On the tour I show in the video below the group saw another cave, which a week earlier were closed off due to instability but that day was fine.
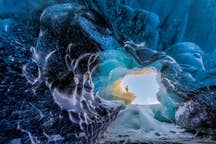
Glacier caves differ quite a lot. In an environment such as the Icelandic with so many volcanos around, the ash from the eruptions gets caught in the ice. This can block out the suns light making the caves more black than blue. This also has a charming effect since you’ll then have spots of blue in a black environment. You can also experience other situations where you’ll see more of the blue ice.
As a photographer you will probably end up on your knees or butt because you want to get down low and photograph the entire ice cave, so be sure to bring a pair of rain pants, which can afford to be very dirty. Ice caves are full of very fine grained sand and clay, which has been grained and molded in the glaciers over hundreds and hundreds of years. This very fine grained sand sticks to everything and can get in everywhere. For that reason be sure to both be very careful with your camera gear and bring some gear, which is weather sealed. Even weather sealed cameras can get their bottoms stuck if they get exposed to too much of this sand.

Because the caves melt and break down each summer they differ a lot from season to season. The guides name the different caves with different names. “Crystal Cave”, “Treasure Island” and “Anaconda Cave” is just some of these names. The most impressive glacier caves I got to witness during the winter of 2017 and 2018 was the “Treasure Island” cave system. To get to this we had to cross the glacier itself. In this particular case there were two caves. This characteristic one with several holes near the entrance where our glacier guide Hali did some posing were in my opinion the most photogenic. However, the other one was the most impressive as the cave itself were really big and deep. At the very end of the big cave a big hole let in a lot of light giving another beautiful scene for photography. It is sad that these beautiful glacier caves melt and break down, but it also makes you appreciate your photos even more as they’ll be pretty unique.

You can even get a tour where you fly from Reykjavik almost all the way to the Ice Caves.
In regard to lenses a wide-angle lens such as a 16-35mm comes highly recommended. If you can go even wider that could be preferable, but make sure the lens can zoom as to not lock yourself down to only one focal length. Despite the caves being dark you’ll need to stop down the aperture to get everything in focus, so it is not necessary to have a fast lens with an aperture of f/2.8 and below. However, because of the long shutter speeds and having to bracket your photos a tripod is necessary.

In regard to composition you will often prefer to get down low and use your wide angle lens to emphasize the size of the cave. Use leading lines, texture and light to guide the viewer’s eyes. In my humble opinion, I think a human element is vital to create a great ice cave photo as we can all relate to the size of a human. As you can see on the photos in this articles I use humans in my ice cave photography. To show the difference and opportunities despite going to different caves, the photos I show here are taken in five different glacier caves. And safe to say, I really prefer to have a human element in there. Both for showing and emphasizing the scale of the cave, but also for the story of the photo.
If you want to see even more from the Ice Caves and get more information and tips on how to photograph them check out my video here:
And visit my HOMEPAGE to see even more incredible images from Iceland. And follow me on INSTAGRAM for daily images.

I've traveled to Iceland several times as a photographer. I've been driving myself and tried both camping and accommodation. From 2018 I work as a photography guide in Iceland Photo Tours leading workshops at some of the most breathtaking locations in Iceland. Check more of my work in these links: http://www.mpiphoto.dk/ https://www.facebook.com/MadsPeterIversenPhotography/ https://www.instagram.com/madspeteriversen_photography/ https://www.youtube.com/channel/UCrWU2BpF6zvRFnkYHDDYHDg